https://fastapi.tiangolo.com/tutorial/
Tutorial - User Guide - Intro - FastAPI
Tutorial - User Guide - Intro This tutorial shows you how to use FastAPI with most of its features, step by step. Each section gradually builds on the previous ones, but it's structured to separate topics, so that you can go directly to any specific one to
fastapi.tiangolo.com
파이썬 프로그램을 수행하기 위한 백엔드 서버를 구축해야하는데 FastAPI를 추천받았다.
빠르게 파이썬으로 API를 구축하기 위한 웹 프레임워크이다.
빠르고 쉽게 설정할 수 있도록 설계되어 있고, Pydantic 데이터 검증 라이브러리를 사용하여 요청 및 답변 데이터를 검증
높은 성능의 ASGI 서버인 uvicorn도 사용
OpenAPI 표준으로 자동 문서 생성
쉽고 간편하면서 파이썬스럽다?고 해야하나..
일단 django보다 훨씬 쉽다
공식문서 튜토리얼에 어떻게 시작하는지 나와있다
왼쪽에 Tutorial-User Guide - Intro에서
1) 가상환경 생성
python -m venv venv
2) 가상환경 실행
source venv/Scripts/activate
3) fastapi 설치
pip install fastapi[all]

4) 패키지 freeze
pip freeze > requirements.txt
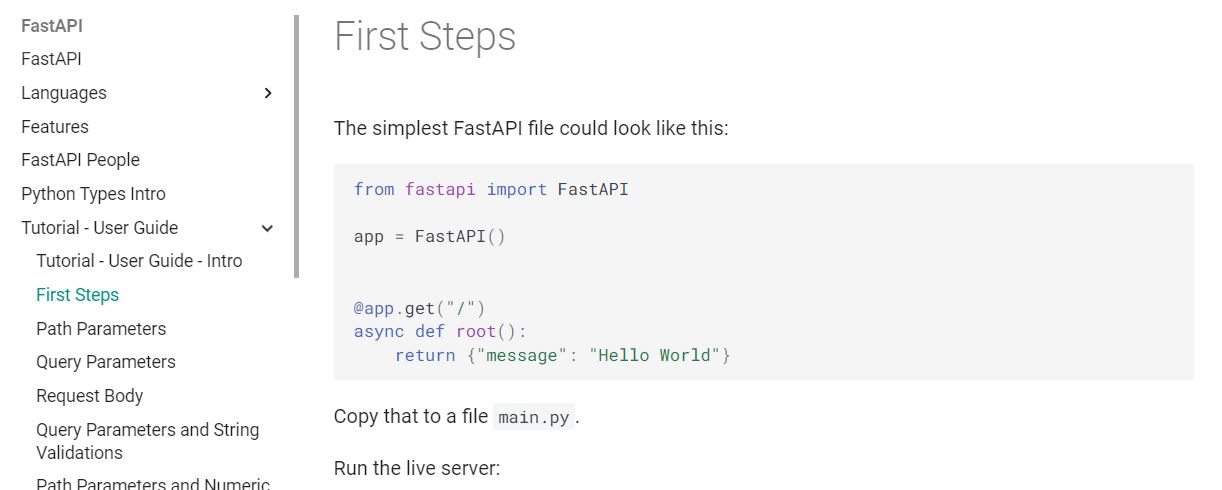
왼쪽 메뉴에 First Steps라고 있다

그대로 작성하면...

저장하고 서버를 실행시켜본다
5) 서버 실행
uvicorn main:app --reload

대충 위와 같은 그림이 나온다.
http://127.0.0.1:8000에 들어가보면... hello world가 나오면 성공이다

api를 만들때는 파이썬 함수를 만들듯이, 함수를 만들고.. decorator로 @app.(request방식)("주소")를 붙여주면 된다
#test
#e.g.:http://127.0.0.1:8000/hello/daehyuck
@app.get("/hello/{name}")
async def say_hello(name: str):
    return {"message":f"Hello {name}"}
테스트용으로 위와 같이 작성하고.. http://127.0.0.1:8000/hello/daehyuck에 접속해본다..

마지막으로 fastapi는 swagger방식의 docs도 자동으로 제공해준다.
http://127.0.0.1:8000/docs에 들어가면, 만들어둔 api를 테스트해볼 수 있는 docs를 볼 수 있다

접속하면 대충 위와 같이 나오고 2번째 api를 클릭해서.. test를 해본다

try it out을 누르고, name에 원하는 값 입력하고.. execute를 클릭하면 실행시켜줌
response body에 그 결과가 나온다
'프로그래밍 > FastAPI' 카테고리의 다른 글
| (Python) 분명히 패키지를 설치하고 FastAPI를 실행했는데 패키지를 찾지 못하는 에러 대처하기(ModuleNotFoundError) (0) | 2024.03.06 |
|---|---|
| frontend(vue.js)에서 FastAPI로 타입이 여러개 담긴 Formdata 보내기 (0) | 2023.05.14 |
| FastAPI에서 front로 파일을 제공하는 방법 - static file serving, Fileresponse + vue.js에서 음성파일 재생하기 (0) | 2023.05.10 |
| front에서 데이터를 제대로 보냈는데 fastapi에서 422 unprocessable entity 에러 나는 경우 (0) | 2023.05.03 |
| 중요한 변수를 숨겨야할 때, 사용할 수 있는 환경변수(env)설정 (0) | 2023.04.17 |

