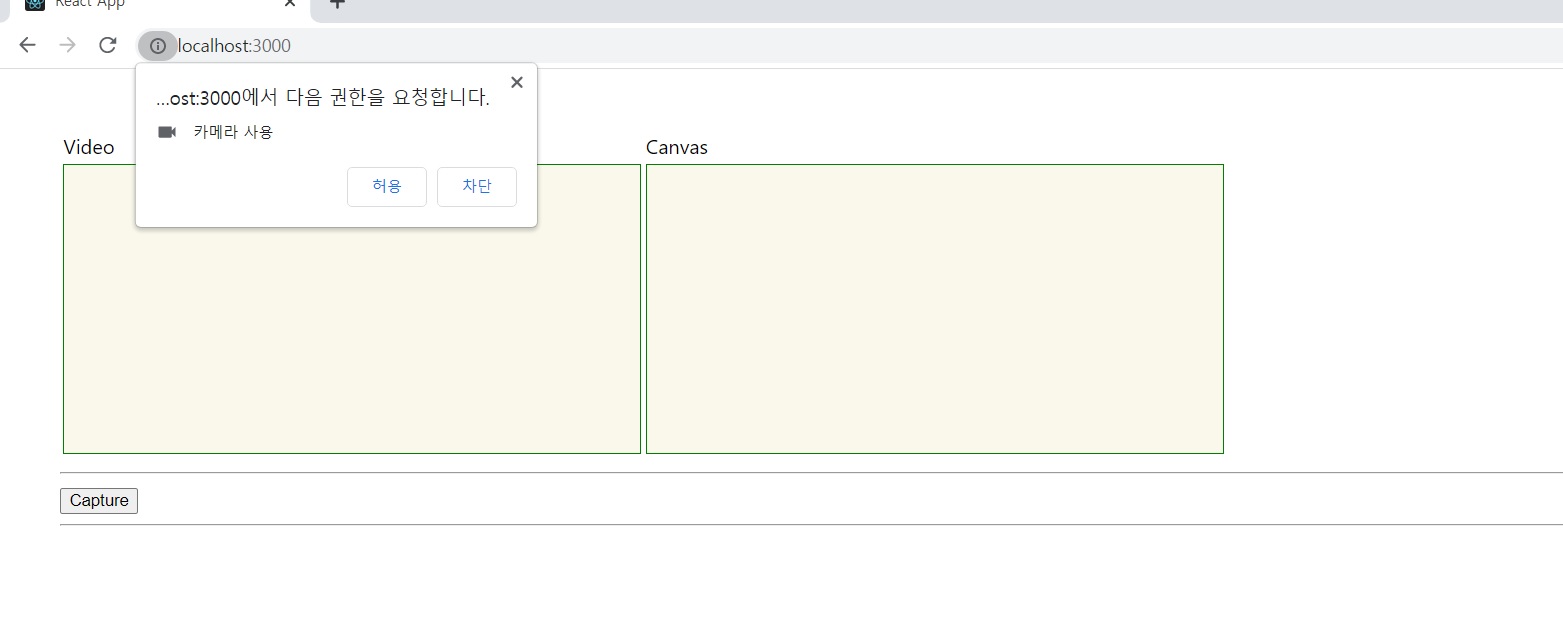
1. navigator.mediaDevices.getUserMedia()
navigator.mediaDevices.getUserMedia()를 이용하면 사용자 기기에 내장된 웹캠을 이용하게 한다
인자로는 객체 형태로 보통 video : true하면 비디오를 쓰고 audio: true하면 오디오를 쓰고..
그 외에 비디오 화면 크기 width, height도 주기도 한다
const getWebcam = (callback) => {
  try {
    const constraints = {
      'video': true,
      'audio': false
    }
    navigator.mediaDevices.getUserMedia(constraints)
      .then(callback);
  } catch (err) {
    console.log(err);
    return undefined;
  }
}
사용해보면 카메라 키냐 마냐 이렇게 권한요청이 나옴

2. videoRef.current.srcObject = stream;
video 참조객체 videoRef에 stream을 넣어주어 영상을 녹화한다는 의미를 가진다
이 객체를 <video> 태그에 참조객체로 넣어줄 것이다
const videoRef = React.useRef(null);
const canvasRef = React.useRef(null);

React.useEffect(() => {
getWebcam((stream => {
  videoRef.current.srcObject = stream;
}));
}, []);
3. canvas drawImage
자바스크립트에서 비디오 캡쳐하는 것은 비디오 영상에서 한 프레임을 canvas 객체에 이미지로 그려넣어주는 것이다
  const drawToCanvas = () => {
    try {
      const ctx = canvasRef.current.getContext('2d');

      canvasRef.current.width = videoRef.current.videoWidth;
      canvasRef.current.height = videoRef.current.videoHeight;

      if (ctx && ctx !== null) {
        if (videoRef.current) {
          ctx.translate(canvasRef.current.width, 0);
          ctx.scale(-1, 1);
          ctx.drawImage(videoRef.current, 0, 0, canvasRef.current.width, canvasRef.current.height);
          ctx.setTransform(1, 0, 0, 1, 0, 0);
        }
      }
    } catch (err) {
      console.log(err);
    }
  }
canvasRef.current.getContext('2d')하면 캔버스 객체에 2d 그림을 그릴 수 있게 해준다
const ctx = canvasRef.current.getContext('2d');
캔버스 넓이, 높이를 비디오 화면 넓이 높이로 맞춰주고...
canvasRef.current.width = videoRef.current.videoWidth;
canvasRef.current.height = videoRef.current.videoHeight;
비디오 객체가 존재하면... ctx.drawImage()는 비디오 한 순간을 캔버스에 그려주는 함수이다
여기서 translate는 비디오 화면을 좌우반전시켜서 그려준다.
좌우반전 시키기 싫으면 translate, scale을 없애면 된다
if (videoRef.current) {
  ctx.translate(canvasRef.current.width, 0);
  ctx.scale(-1, 1);
  ctx.drawImage(videoRef.current, 0, 0, canvasRef.current.width, canvasRef.current.height);
  ctx.setTransform(1, 0, 0, 1, 0, 0);
}
이걸 서버에.. 저장해서 사용하는게 문제인데 그거는 더 찾아봐야겠다..
import React from 'react';
import { Button } from 'reactstrap';

const getWebcam = (callback) => {
  try {
    const constraints = {
      'video': true,
      'audio': false
    }
    navigator.mediaDevices.getUserMedia(constraints)
      .then(callback);
  } catch (err) {
    console.log(err);
    return undefined;
  }
}

const Styles = {
  Video: { width: '30vw', background: 'rgba(245, 240, 215, 0.5)', border: '1px solid green' },
  Canvas: { width: '30vw', background: 'rgba(245, 240, 215, 0.5)', border: '1px solid green' },
  None: { display: 'none' },
}

function WebcamCanvas() {

  const videoRef = React.useRef(null);
  const canvasRef = React.useRef(null);

  React.useEffect(() => {
    getWebcam((stream => {
      videoRef.current.srcObject = stream;
    }));
  }, []);

  const drawToCanvas = () => {
    try {
      const ctx = canvasRef.current.getContext('2d');

      canvasRef.current.width = videoRef.current.videoWidth;
      canvasRef.current.height = videoRef.current.videoHeight;

      if (ctx && ctx !== null) {
        if (videoRef.current) {
          ctx.translate(canvasRef.current.width, 0);
          ctx.scale(-1, 1);
          ctx.drawImage(videoRef.current, 0, 0, canvasRef.current.width, canvasRef.current.height);
          ctx.setTransform(1, 0, 0, 1, 0, 0);

        }
      }
    } catch (err) {
      console.log(err);
    }
  }

  return (<>
    <div style={{ width: '100vw', height: '100vh', padding: '3em' }}>
      <table>
        <thead>
          <tr>
            <td>Video</td>
            <td>Canvas</td>
          </tr>
        </thead>
        <tbody>
          <tr>
            <td><video ref={videoRef} autoPlay style={Styles.Video} /></td>
            <td><canvas ref={canvasRef} style={Styles.Canvas} /></td>
          </tr>
        </tbody>
      </table>
      <hr />
      <Button color="warning" onClick={() => drawToCanvas()}>Capture</Button>
      <hr />
    </div >
  </>);
}

export default WebcamCanvas;
참조
React 웹캠 - 3. Canvas (tistory.com)
React 웹캠 - 3. Canvas
React 웹캠 시리즈입니다. React 웹캠 - 1. Promise 비동기 함수의 이해 React 웹캠 - 2. getUserMedia React 웹캠 - 3. Canvas React 웹캠 - 4. Select webcam Sample Code HTML5의 강력한 엘리먼트 중 하나인 canvas는 그래픽을
rubenchoi.tistory.com
'프로그래밍 > React' 카테고리의 다른 글
| react에서 setState 함수의 비동기적 처리 특징 기억해두기 (0) | 2023.01.31 |
|---|---|
| 리액트 기본 블로그 만들기 실습으로 마무리 (0) | 2023.01.21 |
| 리액트 기본 배우기 -CSS에 대해- (0) | 2023.01.16 |
| 리액트 기본 배우기 -컨텍스트에 대해- (0) | 2023.01.16 |
| 리액트 기본 배우기 -합성과 상속- (0) | 2023.01.15 |

